End-User Device Onboarding
We believe the end-user’s primary goal is to take control of their electricity consumption with minimal to no effort. End-users want easy-to-use, safe, and explainable processes to reduce their energy costs. The software should abstract away complexity to only present end-users with vital information that is easy to understand regardless of the end-user’s technical knowledge.The following workflow achieves the end-user’s goals in the most efficient and frictionless way. Your feedback is very welcome at [email protected].
Complete Onboarding Flow
Step 1: Instantiate End-User Account
When an end-user opts into your device optimization service (e.g., upon visiting a dedicated subpage of your mobile or web app), trigger the process of creating a new end-user account on the Podero platform.user_id which you use for subsequent requests for this end-user.
Step 2: Create Device Onboarding Session
Create an onboarding session that generates a unique URL for the Whitelabel onboarding form.Step 3: Whitelabel Onboarding Form - Manufacturer Selection
The form leads the end-user through a device type-specific selection of available manufacturers. The onboarding form will always be up to date since it is maintained by Podero.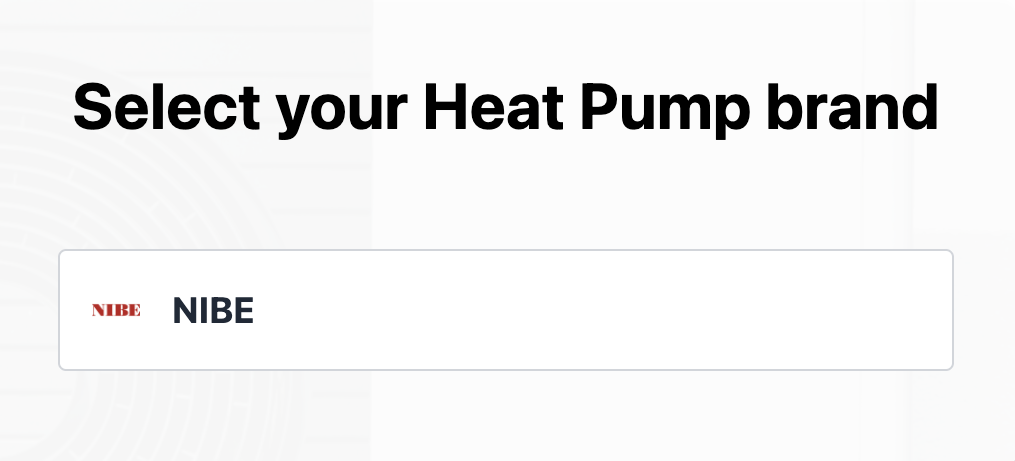
Step 4: Whitelabel Onboarding Form - Connect Device
After selecting their device manufacturer, the end-user is prompted to connect their device. The user journey continues depending on the device manufacturer:Option A: OAuth Redirect
The end-user is redirected to the manufacturer’s authentication webpage (e.g., Nibe myUplink) for secure login.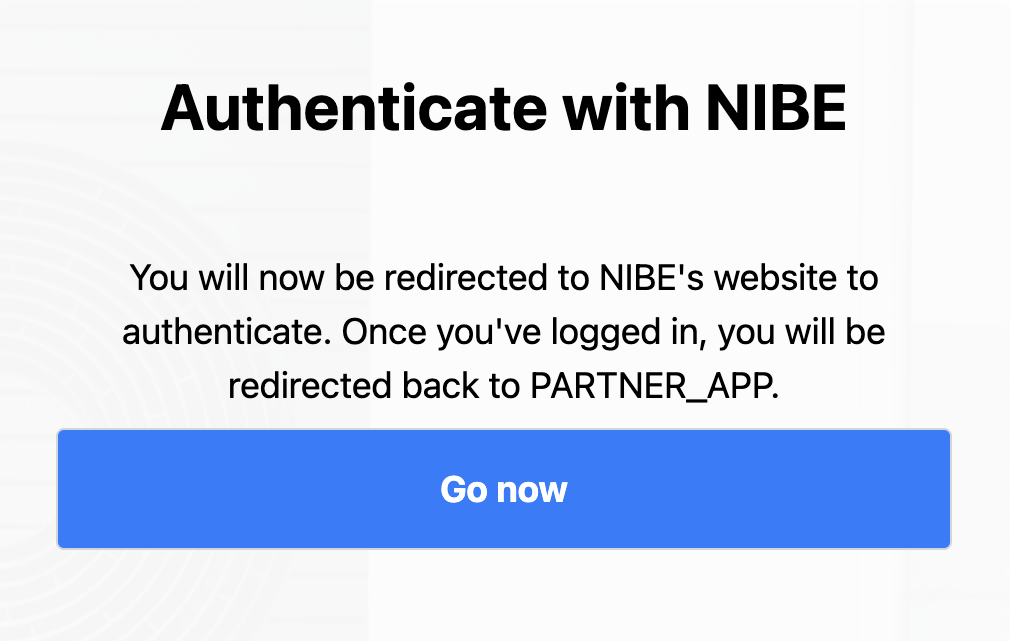
Option B: Generic Login Screen
A generic login screen that calls the manufacturer’s authentication API in the background (e.g., Tesla).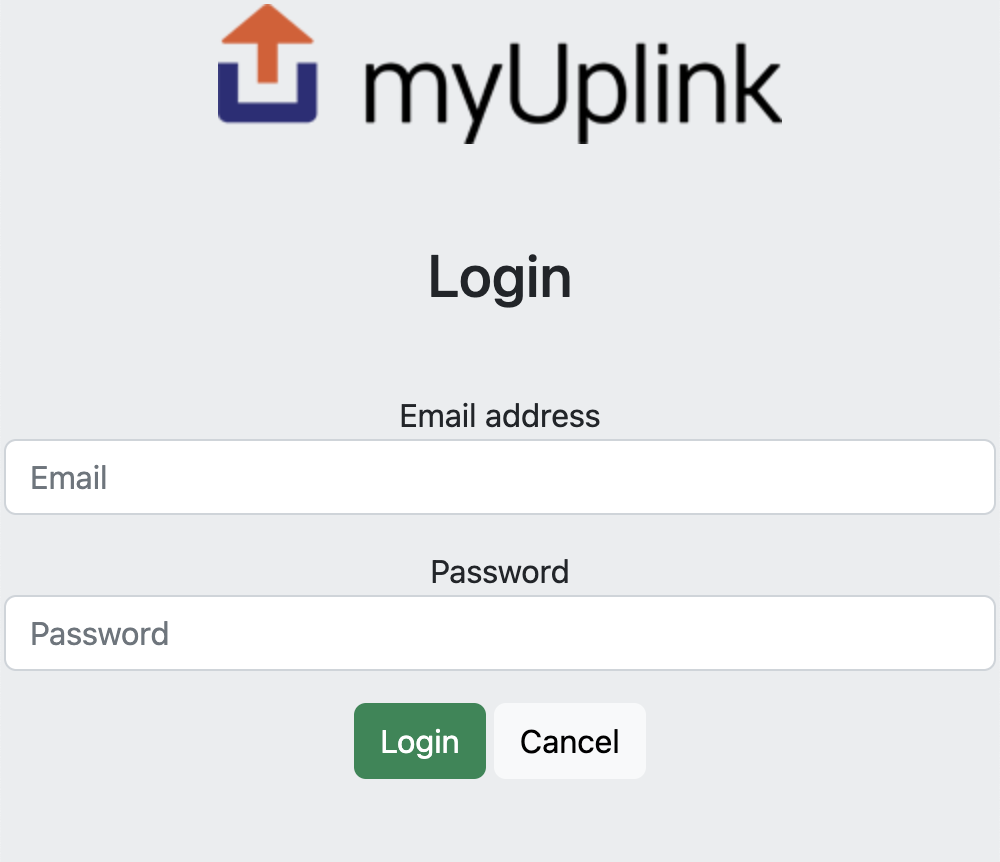
Step 5: Success and Redirect
The end-user sees a success page after completing the onboarding flow and is subsequently redirected back to your application.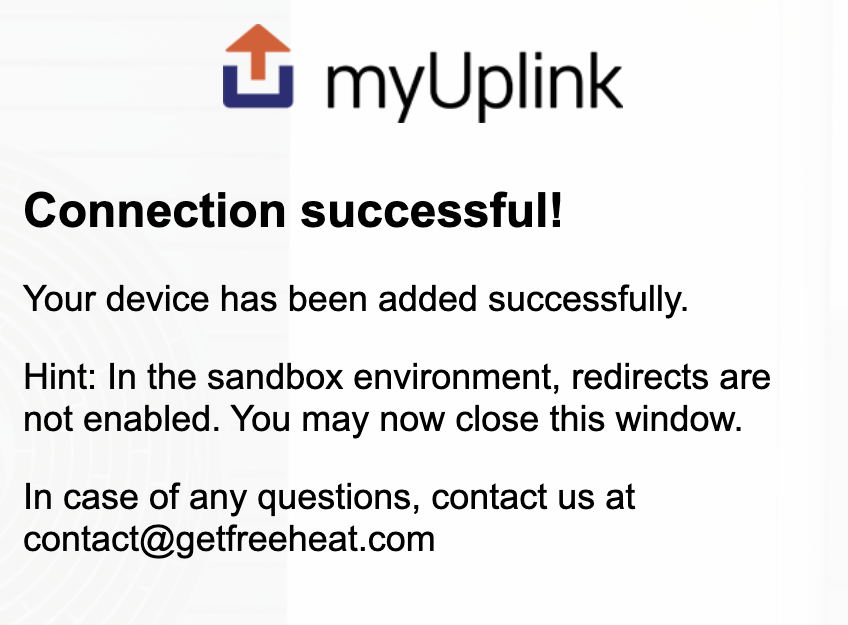
Test Credentials
For testing the onboarding flow, you can use these demo credentials:Nibe myUplink Heat Pump
Nibe myUplink Heat Pump
- Username:
[email protected] - Password:
Demo1234
Tesla Electric Vehicle
Tesla Electric Vehicle
- Username:
[email protected] - Password:
Demo1234
Best Practices
User Experience
User Experience
- Keep the onboarding flow embedded within your app’s user journey
- Provide clear instructions before redirecting to Connect UI
- Handle success and cancel callbacks gracefully
- Show loading states during the onboarding process
Error Handling
Error Handling
- Handle cancel_url redirects (user abandoned onboarding)
- Implement retry mechanisms for failed device connections
- Provide user support options if onboarding fails
- Log onboarding session IDs for debugging
Session Management
Session Management
- Onboarding sessions expire after a certain period
- Don’t reuse onboarding URLs across multiple users
- Create a new session for each onboarding attempt
Next Steps
Setting Preferences
Configure device-specific preferences
Dashboard Integration
Display device status and data to end-users